AEG Induction hob board replacement
Another in the occasional series of domestic equipment repair stories!
We replaced our condemned (no, really, the dishwasher repair man came, saw our hob, and said “You really should not use that again, it’s really dangerous!”) hob in 2015, with an AEG HK654200FB PNC 949 595 108 01. It’s a pretty standard effort, and like all home gear, is made of the same parts as every other one of the Electrolux brands. We love it, it’s really fast, really clean, highly controllable and many a fine meal has been cooked on it.
 |
| AEG HK654200FB Induction Hob |
 |
| The product label |
Sadly (to borrow the word of the last two years) half of it died last week. The right hand pair of cook areas don’t heat up, there’s a repeatedly clicking relay, all the controls work, but no heating action. The left hand side fortunately is fine.
Off to the AEG support website, looking for parts, if only to see what kind of thing might be wrong with it, and get some idea how much it might cost to fix. The original came from John Lewis (middle class me!) in conjunction with an AEG offer for £50 off, so was maybe £350 new. This revealed that there are not many replaceable components, in fact not many large-scale components at all, in an induction hob viz. one coil per cook area, two electronics modules (one per area pair), a power block and a controller block. So, what to do? I'm loath to junk a serviceable piece of hardware if it can be repaired economically, or even if it can't... there's too much new stuff bought unnecessarily.
Dear reader, I did call the local appliance repair company, who've done a good job on other items like the dishwasher. The man came out, looked at it, did all the things I'd done, told me it was the electronics module, which I'd kind of worked out already. That visit cost £78, which I don't begrudge (much), but meant I was already down a bit. A replacement hob, recommended by Which?, from IKEA would be £249, and obviously an immediate fix! AEG offered a module for £145, so the repair company would cost at least that (the man's iPad didn't; work so he couldn't quote me). I did some searching for the module, and located a company in Leeds selling for £128 including postage. Nice. Then eBay turned up an individual, also in Leeds (!), selling one for £75 + £6 postage. Hmm. Dilemma, as alway with eBay things, and committing to repair it myself. What now?
I thought I'd take it apart before I ordered the part, to see how accessible it was and so on. I removed it from the counter, turned it upside down, as you would, and worked out how to undo the clips round the edge of the large, flat pressed metal sheet box on the back. They simply press in, releasing the cooktop form the back box. You can see one in the central rectangular hole in the photo - the other clips just align the back with the top during assembly and also clip the hob into the countertop hole.
 |
| Clip retaining cook surface against back box |
You'll see the picture showing the hob the right way up - reader, this is the best/only way to dismantle this object!
DO NOT ATTEMPT TO REMOVE THE COOKTOP IN AN INVERTED POSITION!!
I was appalled to find that everything inside seemed to be spring loaded and it fell out of position instantly, and to say that I beshat myself at that point would be an understatement! I now had a hob that was partially disassembled and didn't want to go back together... fortunately, after I'd breathed calmingly for a bit, I rotated the dodgy misassembly the right way up, and the top came away from the back box cleanly. I lifted off one of the power coils, to look at the electronics module, which seemed to be pretty simple to remove and dis/reconnect. I found the control panel was on springs, and adjusted its position before replacing the top. Phew. Replacing the top wasn't too hard, jus tricky aligning the clips over the right spots all the way round, without getting any of the relatively delicate clips bent. And it still worked, or at least, as well as it had done, so that was a win. I ordered the part from dodgyCookerPartsRUs.ebay.co.uk, and awaited delivery, meanwhile using only two cooking areas.
 |
| First level of disassembly, showing coils and controls |
eBay vendor did a good job, part arrived in two days, allowing for the Bank Holiday, well wrapped and with a note from the manufacturer indicating that two jumper wires had to be reused from the old part if necessary. OK!
This time I kept the hob the right way up (after turning off the power at the main switch!), and the cooktop came off relatively easily. I found that using a pointed knife blade expedited flipping the clips under the edge of the holes - since the components inside are spring loaded to keep them in contact with the underside of the cooktop, they keep the clips pressed against the edge of the hole.
Lifting the coils off is not hard, they have little metal tags that go in holes in the plastic support for the board, but the left hand ones are a little fiddly. I just put my fingers underneath and wiggled them out. I kept a note of which holes they came from, the whole side of the plastic module box has holes, and aligning the coils with their defined cooktop areas is obviously important.
All the connections are either Torx 20 bolts, fiddly multi-connectors or spade terminals/conectors. I took pictures of the relevant areas before disassembly, although they are pretty obvious. The photos show the connectors highlighted.
 |
| Induction coil connections (one plug hidden) |
 |
| AC and mystery ground/earth connections |
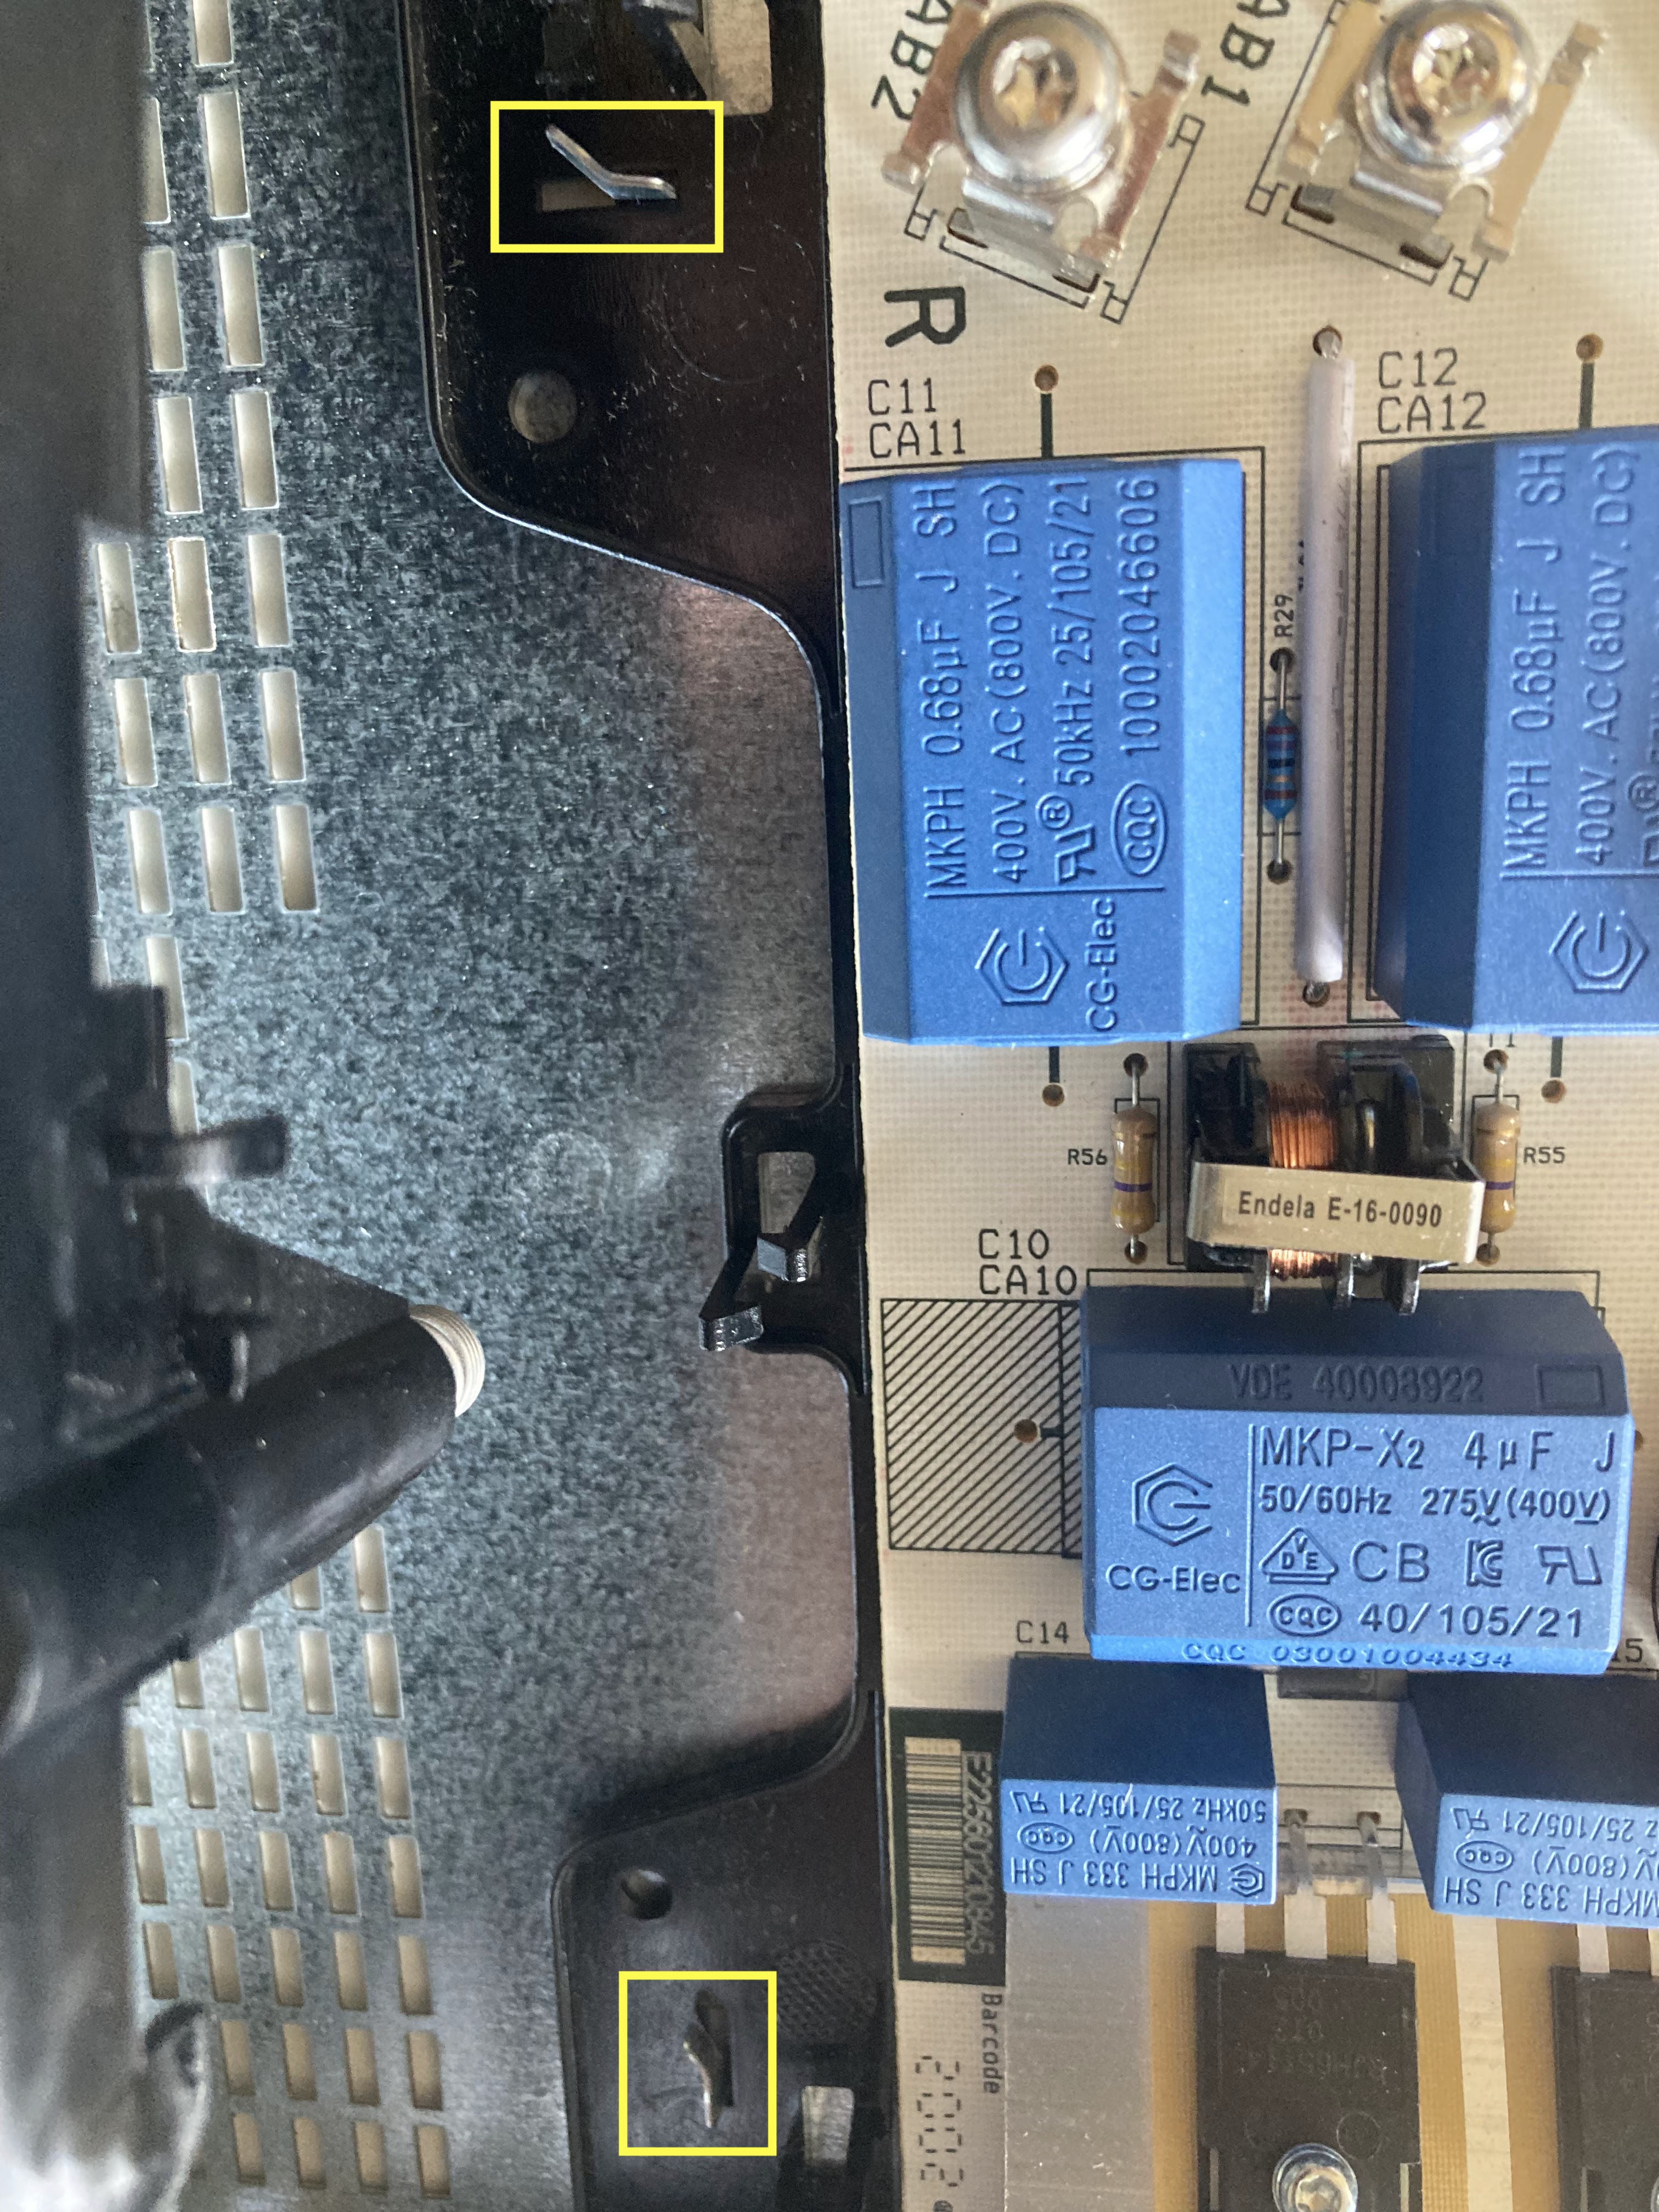 |
| Location of bend over tabs holding module |

Comments
Post a Comment